We recommend K-Secure VPN to setup a secure connection between RTO Pro Corporate / Home Office and store level for company wide inventory inquiry and remote payment ability. K-Secure VPN is inexpensive and easy to setup. Below we have included basic instructions for setting up K-secure for use with RTO Pro.
If you need further assistance setting up a secure connection between your stores and home office contact your Internet service provider or a network specialist. Our support services do not include setting up your Internet, routers, wide area connections or VPN.
We recommend RTO Tech to anybody who needs help setting up a secure connection or VPN. See their website here http://www.rtotech.com They also offer remote network and hardware support and can lock down your system to prevent employees from accessing websites you do not authorize.
Setting up secure store to home office computer connection using K-Secure VPN
K-Secure can be downloaded here: http://k-secure.com
K-Secure Server would have to be downloaded and installed on the Home Office computer, K-Secure Client would have to be installed on any RTO Pro computer you wish to view master inventory records or enable remote payments on.
Setting up the server computer (computer running RTO Pro Home Office)
1. Download and install K-Secure Server (see link above).
2. Get the IP address of the server computer. Open a command prompt, to open a command prompt in Vista you can click on the Windows Start button and type "CMD" where it says "Start Search" and push enter. From the command prompt window type "IPCONFIG" and a window like below will be displayed. The IP address for the computer this was run on is 192.168.1.103.
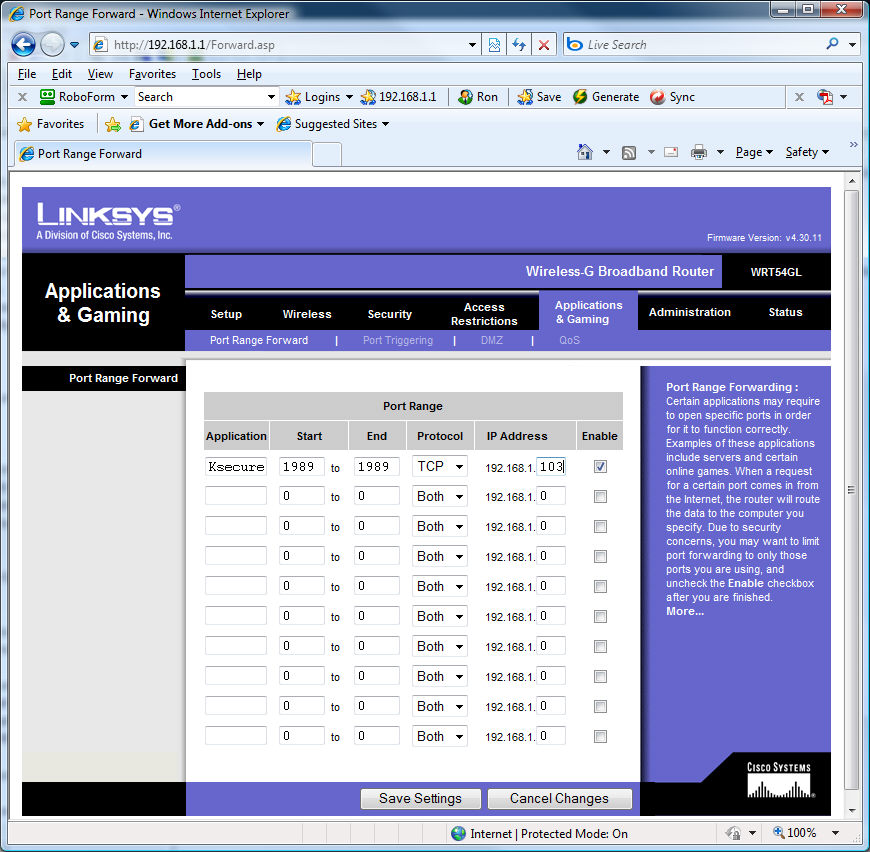
3. Next your router has to be setup for port forwarding for K-Secure. K-Secure can use any available port greater than 1024, in this example we are going to use 1989. The IP address to forward to needs to be the servers IP address. See the image below. The only thing that would need to be changed is put your servers IP in the IP address line. Note all routers are different so see your router instructions on how to get to the setup for the router. For the test router we used to get to the setup mode you open internet explorer and type "http://192.168.1.1/" in the address line, then leave user name and password blank (only works if you have not setup password for the router).
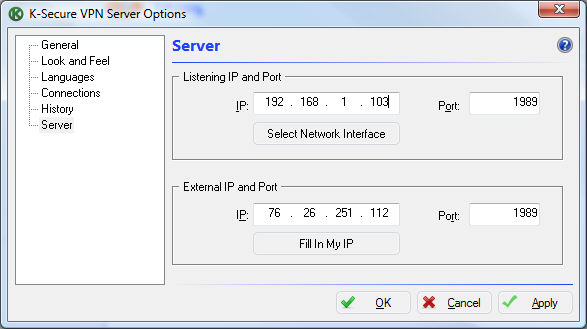
4. Open K-Secure Server on the home office server computer. Push F2 to open the settings screen. Click on the "Server" link as displayed below, click "Select Network Interface" and select either "All Interfaces" or your network adaptor that will be listed, either selection should work, then enter the port (1989 in this example). Then click the "Fill in My IP" button,(NOTE: you will need this IP when you setup the stores... the External IP) then click the OK button.
5. Click "Groups" then click Create, type any name you like in the name space and click next, then click Finish.
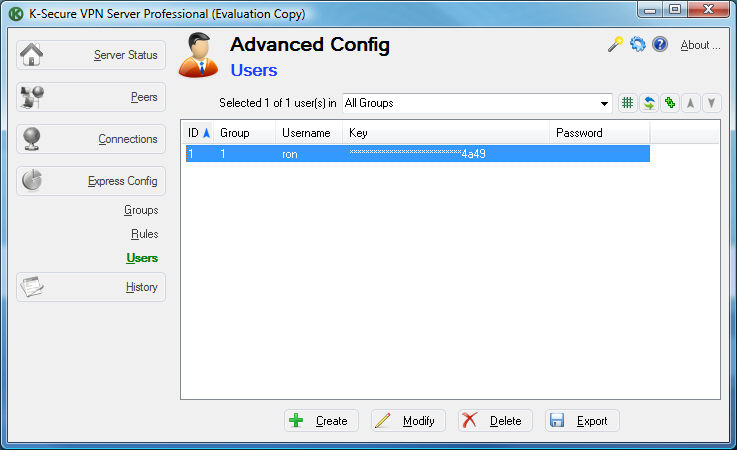
6. Click "Users", then click "Create". You can use any names you like for the users, all users (remote computers) can use the same user account on K-Secure if you like also or you can give each computer or store their own. Type the name you would like to use and click next, choose "This user is a child of the following group" and select the group you made in step 5, then click next. An access key will be generated, you do not have to write this down, you can import this info into the clients at the store level. Click next then enter a password if you want to password protect the import file. After your users you wish to use are created go to the next step.
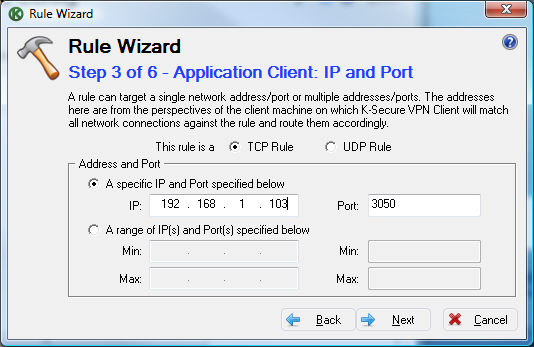
7. Click "Rules" then click "Create", type FB for the name (it can be anything you like), then click next then select the group you created and click next. The screen below will come up next, fill it in just like below except replace the IP shown below with YOUR servers IP address, then click next.
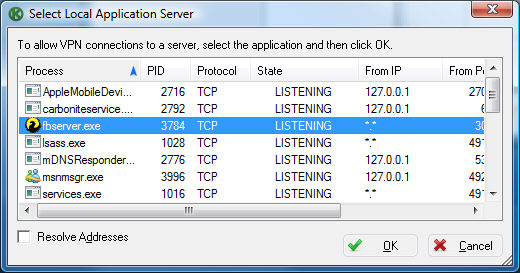
8. Click on the button that says "Select an application server running on this machine", the select "fbserver.exe" as it shows below and click "OK".
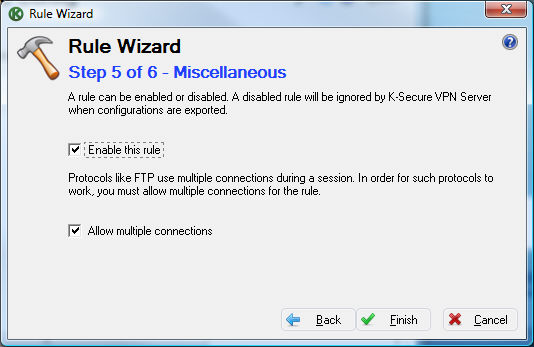
9. Fill in the next screen the same as below then click finish.
10. Click on "Server Status" then click "Start VPN Server"... and your server is ready to go.
Next you need to export the user info to be imported on the clients, choose the user and click "Export", choose where to save the file and you are finished at the home office side, see below to setup clients (store computers). At the store you will only need this import file and the IP address of your router at home office (the external IP from step 4).
Setting up the remote (client) computers (computers running RTO Pro)
1. Download and install K-Secure VPN Client http://k-secure.com/files/SetupKsVpnClient.exe. Click on "Servers" and click "Import" browse and select the import file you created at home office. Then click "Client Status" and click "Start VPN Client".

2. In RTO Pro go into Setup > Store Setup and click on the Other tab. In the Master Inventory server name put the IP address of your router at home office, note this is not the same as the IP address of your server computer at home office. Note: in the image below it shows "localhost/3051" in the IP address line, for K-Secure it should be an IP address (IP of your home office router) / port such as "76.26.251.112/3051". After entering this info hit save and you are set.
In the "Path to database file on home office server" put the following: c:\rtoho\
The path above is the default path, if your path is different put the correct path.
Below is a screen shot of where you put the settings in RTO Pro. It is in Store Setup under the "Other" tab.
